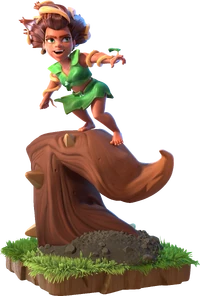
Who Is the Druid?
The Druid is Clash of Clans’ fifth hero, introduced at Town Hall 15. Unlike the other four heroes — who are primarily fighters — the Druid is a support hero. His passive aura continuously heals nearby ground troops, and his ability transforms him into a powerful Bear form that combines high HP tanking with burst healing to the surrounding army.
He’s the first hero in COC’s history with a dedicated healing role, and his presence fundamentally changes how ground attacks play at TH15 and above.
Druid Stats and Ability
Resource: Elixir (not Dark Elixir)
This is one of the most important facts about the Druid — he costs Elixir to build and upgrade, the same resource used for building and troop upgrades. He doesn’t compete with your Dark Elixir budget.
Passive aura: The Druid continuously heals all friendly ground troops within his aura radius. At higher levels, the healing per second increases and the radius expands.
Active ability — Ursus Form: The Druid transforms into a large bear with:
- Massively increased HP (absorbs damage that would kill the Druid himself)
- A healing burst to all nearby troops on transformation
- High melee damage output during bear form
When Ursus Form ends, the Druid returns to human form and the passive healing resumes.
Why the Druid Changes TH15 Attacks
Before the Druid, TH15 ground attacks lived or died on the Warden’s Eternal Tome timing. If the Warden’s ability was used at the wrong moment, the push collapsed.
The Druid adds a second layer of sustain. Ground armies with the Druid attached survive situations that would have ended pre-Druid:
- A Yeti push with Druid attached sustains through Eagle Artillery fire that would have killed the army without him
- Root Riders with Druid support maintain HP through multi-Inferno fire after the main wall breach
- The Druid’s Bear transformation absorbs burst damage from the Monolith that would otherwise wipe clustered units
He doesn’t replace the Warden — he extends the attack’s survivability window so the Warden ability can be saved for the most critical moment.
How to Deploy the Druid
Position: Behind the Push, Not in Front
The Druid’s healing aura is radius-based — he heals troops near him. If he charges ahead of the army, he heals nobody. If he trails behind, he heals the units that are most actively taking damage.
Correct deployment: Place the Druid 2-3 seconds after your main push (Root Riders or Yetis). He’ll walk slightly behind them, and his aura will cover the rear of the advancing army — the units that have survived long enough to still be fighting.
Time Ursus Form for the Monolith
The Monolith fires a burst that scales with nearby building damage absorbed. This burst can one-shot or severely damage your clustered push. Activate Ursus Form at two moments:
- When the Monolith burst fires — Bear form HP absorbs the burst and the healing burst mitigates secondary damage to surrounding troops
- When HP is dropping rapidly — Inferno Towers or Eagle Artillery burning through the army is the other ideal activation window
Don’t Activate Too Early
Ursus Form has a cooldown. Using it on the outer ring of defenses wastes the ability when the actual threat (Eagle Artillery, Monolith, max Infernos) is in the core. Hold it until the push enters the second or third compartment.
Druid + Other Heroes: Synergies
Druid + Warden
The two support heroes working together cover almost every threat:
- Druid provides continuous healing throughout the attack
- Warden Eternal Tome provides invincibility for burst moments
- Combined: use Druid healing for sustained damage, Warden for spike damage events
This combination means the push has both passive sustain and emergency invincibility — a level of durability that makes even Eagle Artillery + Monolith combinations survivable.
Druid + Queen Walk
The Druid isn’t usually part of a Queen Walk — his aura targets ground troops, and the Queen is often isolated during a walk. However, once the Queen rejoins the main army after her walk, the Druid’s aura buffs her alongside everyone else.
Deploy the Druid at the moment the Queen merges with the main push, not during the walk phase.
Druid + Root Riders
Root Riders move fast and bypass walls — they often outpace the Druid’s walking speed. Deploy Root Riders first, then the Druid immediately after. He’ll trail the Root Rider formation and heal units that have already passed through the first wall layer and are taking sustained defensive fire.
Upgrade Priority
The Druid uses Elixir, which means upgrading him never delays Dark Elixir hero upgrades. There is no reason to leave the Druid idle.
Every level improves:
- Healing per second (aura)
- Aura radius
- Bear form HP and heal burst magnitude
Key level milestones:
- Level 10: Healing output becomes noticeable in sustained attacks
- Level 20: Aura radius covers most of a typical push cluster
- Level 30: Bear form can absorb a full Monolith burst without dying
Rule: Keep the Druid upgrading at all times. He’s the easiest hero to maintain because Elixir is abundant and his upgrades never compete with DE spending.
Common Druid Mistakes
Deploying the Druid in front of the push. He heals troops around him — if he’s alone at the front, there’s nobody to heal. Place him with or slightly behind the main army.
Activating Ursus Form immediately. Many new Druid users activate the ability as soon as it’s available, which wastes it on the outer ring where the real threats haven’t appeared yet.
Ignoring the Druid because he “just heals.” At TH15+ war, the difference between a 2-star and a 3-star is often the 8-10% of Yeti or Root Rider HP that the Druid’s aura maintained through a critical firing sequence. He’s not flashy, but he quietly determines whether attacks complete.
Leaving the Druid idle while upgrading other heroes. Unlike the Barbarian King or Archer Queen, the Druid uses Elixir — a resource you likely have in excess. A Druid sitting at level 1 for three months is three months of free upgrade time wasted.